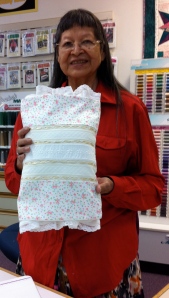
Hand Smocked Dress

My granddaughter finally grew into the dress I smocked for her when she was born, as I described in this post. I used a pre-pleated dress from Martha Pullen Company, which I hand-smocked and embellished the hem.

I think she really enhances the dress, but then again, I couldn’t be biased, could I?

20130809-122332.jpg

20130809-122345.jpg

20130809-122353.jpg

The unexpected from unusual fabrics

One of the reasons I love teaching classes without kits is I get to see one project presented lot of different ways.  Recently I taught a class for a traditionally sewn heirloom pillow sleeve.  The original was all cream and white, with the main fabric being an ecru silk dupione.  One of my students came with a lovely little floral fabric, and her pillow was absolutely adorable.  So, step out of the box and use a new fabric.  You  might enjoy your creation even more than what the pattern suggested!

IMG_1520

When the Kindle update for my pattern will be available

I have learned so much from this publication experience.

My Kindle update is uploaded and available for purchase.  Anyone purchasing the book from today forward will receive the updated version with the proper formatting.  For those of you who purchased already, the update will not be available for you to download for the next 2 weeks.  So, I will notify you again then when it’s available.

Phew!  But learning something new is so much fun, once you get past the challenges involved, isn’t is?

Serger Cover or Sewing Machine Cover Pattern

Although I feel like I’ve been offline for forever, it’s actually only been a little over a month.  We are now finished with our travels, and I hope to start posting more regularly again.

Why did I name this post “Serger Cover or Sewing Machine Cover Pattern?”  Because I just published my Poppy Serger Cover pattern on Kindle.  You can find it at: http://www.amazon.com/Poppy-Serger-Sewing-Machine-ebook/dp/B008HV2106/ref=sr_1_1?s=digital-text&ie=UTF8&qid=1341605215&sr=1-1&keywords=poppy+serger

As you might imagine, I am terribly excited.  But, do you want to know what’s even better?

The great news is:  For Prime members it is available for FREE through the lending library for the next 3 months.

And the BEST news is:  The pattern is available for FREE to everyone this weekend, July 7 and 8.  So, be sure to look it up on Saturday or Sunday to get your own FREE copy.

Although the cover looks complicated, it is actually very easy.  The book is full of lots of different techniques, from which you can pick and choose which you want to use on your cover, and which you would rather use some other time.

ENJOY!

Christening Gown Slip

Thanks to Carole whose comment on my christening gown post encouraged me to make a slip to go with the gown.  I made it from batiste, to keep it cooler and lighter under the heavy bridal satin skirt.  The gown is ivory, but I embroidered the slip with ivory thread on white batiste.

The designs surrounding the main monogram are from the large design on the gown’s skirt.

The swirls were from a design set, and all the lettering came from Monogram Wizard Plus and BES Lettering.

I was especially excited about the bottom edge, as I used my Precise Positioning feature for the first time and created a beautiful, continuous border.  This border embroidery comes from Kathy Harrison of  Custom Keepsakes.  Her embroideries are wonderful!

My one disappointment was in making the coverstitch pintucks.  When I opened the new pintucking foot I had bought (the dealer has gone out of business now), I found that one of the important pieces was missing.  I tried to fix it a different way, but the tucks did not form.  Oh, well.  Instead they are just a shadow embroidery embellishment, so not all is lost, even if they are not what I had originally hoped for.

(Apologies that the slip is not fully ironed in the photos.)

What? Take your wedding dress APART?

We’ve all heard about people taking old heirloom wedding dresses that had deteriorated beyond use and repurposing the useful sections for christening gowns, pillows, quilts, and other special new uses, but when my daughter, married just over a year and expecting her first child, asked me to use her wedding dress to make the baby’s christening gown, my first reaction was, “Are you kidding?  No way!”  Actually, that was what I said in my head.  I was stunned and didn’t say anything at all at first, which was the right choice. It gave me a moment to think and it gave my daughter an opening to explain her reasoning.    Her dress, as gorgeous and expensive as it was, would not be in fashion long.  It would probably not be at all useful to any daughter she might have, and her sister would not want to wear it, so why keep it?  I am a strong advocate of re-purposing and recycling, so at least trying to reuse the dress appealed to my “tree-hugger” side, as my husband calls it.  My daughter was right, and I agreed to take on this challenge.

Her gorgeous dress has now sat in my living room for over a month, and I just could not bring myself to get a seam ripper near it until last night.  When I started, I decided I needed to document the metamorphosis this dress will undergo, to remember the beauty that it was before, and see the butterfly it may become.  Well, that is my hope anyway.  We will see if I can pull it off.  The dress is a very heavy polyester satin, so I may use the dress to make a quilt for the baby and make the christening gown out of batiste, as I originally planned.  But before I decide, I need to get the dress apart and see what the fabric offers.

Here are some pictures of the gown before deconstruction began.

So, where to start?  It was well-made and all the seams appeared to be inside between the layers of fabric.

The back bustle was made from a godet of three (3) tiers of lace, two (2) of which were gathered and sewn on in two (2) rows.

I decided to remove these rows of lace first.  I found that they were gathered with one line of gathering stitches, and then were sewn onto the top layer of the dress.  They were also incorporated into the seams, so I would need to undo the dress seams to completely remove these ruffles entirely.

The first seam I tackled was the long center back seam.  I discovered a wide horsehair braid at the hem, and I was surprised by the wide seam allowance the full length of the seam.  I also discovered another layer of the gown, the underlining.

So now there was the attached petticoat, the lining, the underlining, and the outer layer of fabric.  Although it’s always been my dream to create a wedding dress, I now think I’ll pass on that one.  Wow!

The seam allowances were different widths, depending on the placement on the dress.  The long”stress” seams, like the center back, had very wide seam allowances.

Here is the outer fabric with its underlining visible.  The underlining is a heavy woven fabric.  Not as heavy as canvas, but about as heavy as a twill, just without the twill weave.  I feel I should know what it’s called, so if anyone knows its name, please share that with me.  Thanks.

I also found that in some places the outer skirt was tacked to the lining through the lace in several spots. To reinforce the tack stitches, there was a folded piece of satin fabric on the inside of the lining.

I now have the back seam open as far as the top of the bustle, I’ve separated the outer fabric from the lining all the way around at the hem, and I have one of the long seams holding the lace panels in place partly open.  More discoveries await me next time, I’m sure.


© Sherilyn Siegmund-Roach and Cherished Needle Creations

Smocking in the Hoop

Wow!  Time is just flying for me right now, and the time to write is eluding me.  I was able to finish three of the 6 projects I started at the Martha Pullen School of Art Fashion, as those 3 were just about done before I came home.

The first was the heirloom baby bonnet we made in the introductory class.  I have decided that for when I attach lace to anything, I prefer using a sewing machine, but when I attach entredeux or bridging to fabric, I prefer to use a serger.  I also learned that I may prefer using a narrow hem to a rolled hem for that particular seam.  It’s a bit bigger, but it is flatter.  I still need to play around with that idea some more before I decide which I really prefer.

I loved using my embroidery machine to smock.  We took our smocked insert and made a sundress, on which I had to practice all sorts of other techniques as well.  Here is a picture of the smocking.  The flowers were embroidered on top of the smocking, and can be found on the Martha Pullen site as a free download.  The smocking design is from a design CD Martha Pullen Co. sells called Smocking in the Hoop.Here’s the sundress.

This also inspired me to try out the smocking stitches on my sewing machine.  I hope to get the time to try that out pretty soon. Martha Pullen Co. also sells pre-pleated fabric, which is what we used for this dress.  That is sure handy!

Other techniques on this sundress included a nifty way to insert piping into bias bound edges, and using a serger to attach the ric rac hem trim and to make cover stitch tucks.  The serger was used for quite a bit of this dress, making it much quicker to make than it would have been otherwise.

We also made matching headbands, where the main construction was done in the embroidery hoop.  One was only embroidered, and the other I embellished with flowers made from serged fabric. That was surprisingly fun!


© Sherilyn Siegmund-Roach and Cherished Needle Creations

Welcome

Welcome to Cherished Needle Creations.  I have now joined the blogging masses in order to offer more ways for you to learn the tips and techniques for beautiful machine embroidery and sewing that I will be sharing.  I have over 40 years of sewing, embroidery, knitting, and crocheting experience.  My needleart passions are eclectic, and currently focus primarily on machine embroidery and serger sewing.  I look forward to sharing projects, ideas, tips, and techniques for these and other needlearts here and on my website, www.cherishedneedlecreations.com.  Check out my website for a free newsletter with projects as well as new techniques.

I look forward to chatting with you!

Materia Medica

by Chloe Sobejko

Everyday Essentials

A creative home for machine embroidery, sewing, and serger projects and techniques.

Notorious Beauty Blog

I believe in manicures. I believe in primping at leisure and wearing lipstick. I believe happy girls are the prettiest girls. -Audrey Hepburn

Cat Eyes Red Lips

Beauty, Fashion, Lifestyle

theimaginationmuscle

Birthplace to all ideas:please, let me share a few of my own.

The Official Colonel Sanders Podcast

An All American Rags to Chickens Story

Dresses & Me

I love to sew

knit the hell out

More obsessed with each passing stitch.

M&J Blog

A creative home for machine embroidery, sewing, and serger projects and techniques.

The Seeds of 3

Sewing, Gardening, and Homeschooling Adventures

WeAreDAR

To Give. Globally.

dianedziel

fashion design is also pattern making and sewing

Bag'n-telle

Design-It-Yourself handbags